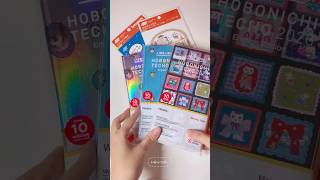
DIY Yarn Sample Cards: An Easy Way to Keep Track of Your Yarn
As your yarn stash grows, it gets harder to remember what you already have. The ball band disappears, the project you bought it for is long finished, and all that’s left is a vague memory of how the yarn felt. You might remember that it was soft, or that it had good stitch definition, but when you’re planning a new project, that information often isn’t enough.
This is where yarn sample cards come in. They’re not meant to replace detailed records or perfectly catalog your stash. Instead, they work as a simple, physical reference you can flip through whenever you want to quickly check a yarn’s thickness, texture, or overall feel. After trying a few different organization methods, I found that making my own DIY yarn sample cards was the easiest way to keep track of my yarn without overcomplicating things.
Table of Contents
- Why Yarn Sample Cards Are Useful for Knitters
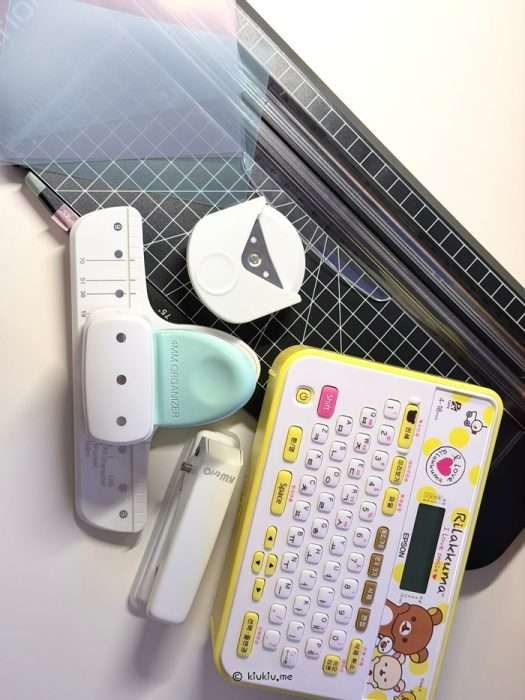
- Materials Needed to Make Yarn Sample Cards
- Clear folder
- Label maker or permanent marker
- Paper cutter or knife/scissors
- Corner rounder punch or scissors
- Binder hole punch (4mm and 6mm)
- Yarn
- How to Make Yarn Sample Cards (DIY Steps)
- Step 1: Cut the Clear Folder to Size
- Step 2: Round the Corners
- Step 3: Punch Holes
- Step 4: Attach the Yarn Sample
- Step 5: Label the Yarn Sample Card
- Using DIY Yarn Sample Cards in Your Knitting Workflow
Why Yarn Sample Cards Are Useful for Knitters
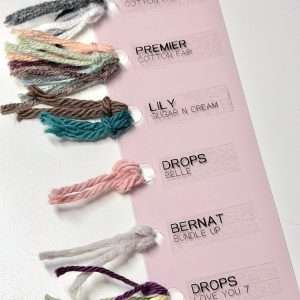
Yarn sample cards are small cards that hold short strands of yarn, usually labeled with the yarn name and brand. At first glance, they might seem unnecessary—especially if you already keep digital records of your stash. But once you start using them, their value becomes clear.
I personally use a Notion knitting journal to track everything related to my yarn, including:
- yarn brands and yarn names
- fiber content and category
- yardage per ball
- swatches and notes
- price
It’s great for storing detailed information, and I rely on it heavily. That said, there’s a clear difference between reading about a yarn and actually seeing it in front of you. Texture, thickness, and drape are hard to fully capture through photos or text alone.
Yarn sample cards work as a physical reference that complements digital records by letting you:
- compare different yarns side by side
- feel the fiber and thickness with your hands
- quickly judge whether a yarn suits a specific project
Digital tools are excellent for organization and long-term record-keeping, but physical samples are much better for quick, sensory checks. Using both together has been the most practical solution for me. If you’re curious about how I organize my yarn digitally, I also share more about my Notion knitting journal in a separate post.

Materials Needed to Make Yarn Sample Cards
You don’t need any specialized tools for this project, and most of the items are things you may already have at home!
Clear folder
You can use a thick or thin clear folder; the thickness doesn’t matter as long as it can be cut cleanly. Color is completely up to you. Clear works well if you want a minimal look, but tinted folders are fine too.
Label maker or permanent marker
You’ll need something that can write on plastic. A label maker is convenient for clean, readable labels, but an oil-based permanent marker also works if you prefer handwriting.
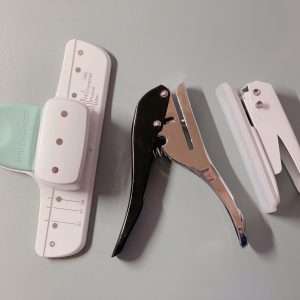
Paper cutter or knife/scissors
A paper cutter is highly recommended! Cutting multiple cards to the same size is much cleaner and faster with a paper cutter than with scissors or a craft knife.
Corner rounder punch or scissors
Once you cut plastic, the corners can become sharp. Rounding them makes the cards safer to handle and gives them a more finished look.
Binder hole punch (4mm and 6mm)
Hole size is flexible, but I use 4mm holes for thinner yarns and 6mm holes for thicker yarns. A binder hole punch makes it easier to punch consistent holes. I’ve written a separate post recommending binder hole punches if you want more details on that.
📝 Related Posts in This Section →
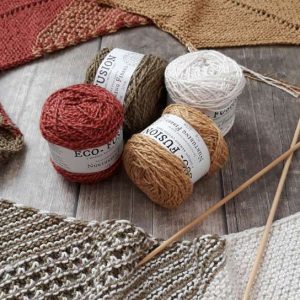
Yarn
Any leftover yarn from your stash works. You only need short lengths for each card.
How to Make Yarn Sample Cards (DIY Steps)
Step 1: Cut the Clear Folder to Size
Start by cutting the clear folder into uniform cards.
I cut mine to match the height of an A7 binder but kept the width much narrower to make the cards compact. Each card measures 4 cm wide and 12.5 cm tall, and the width can be adjusted depending on your storage preference.
Using a paper cutter makes this step much easier, especially if you’re making multiple cards at once.
At this stage, exact measurements aren’t critical for understanding the process. You just want all cards to be the same size so they stack neatly.
Step 2: Round the Corners
After cutting, the corners of the plastic can be surprisingly sharp. This is especially noticeable with thinner clear folders. To fix that, use a corner rounder punch to soften each corner.
If you don’t have a corner punch, scissors will work, but the punch gives more consistent results. This step is small, but it makes a big difference in how finished and comfortable the cards feel.
Step 3: Punch Holes
Next, punch holes for attaching the yarn samples. I punch six holes in total, spaced to fit the height of an A7 card.
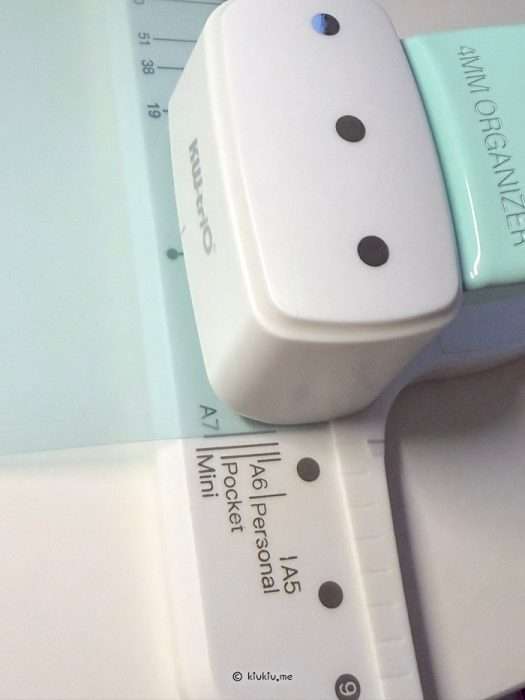
To keep this step simple and consistent, I use a three-hole punch twice—once for the top set of holes and once for the bottom. This makes it easy to line up the holes evenly without measuring each one by hand.
📌 Tip: Choosing the Right Hole Size
I usually start with a 4mm punch, which works well for fingering or sport-weight yarns. If the yarn is thicker, I either start with a 6mm punch or enlarge the holes later by punching over them again.
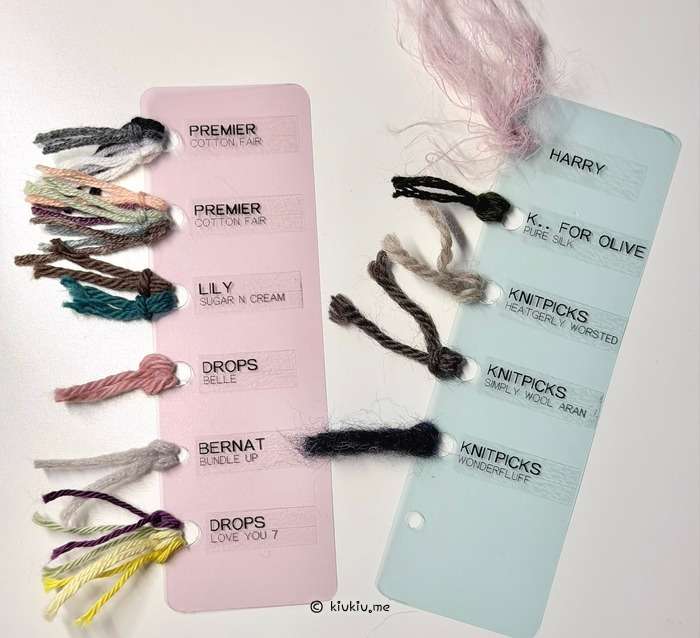
Step 4: Attach the Yarn Sample
Cut a piece of yarn about 8 cm long. This length is enough to show texture without adding bulk. Fold the yarn in half, then insert the folded end through one of the punched holes.
Once the loop is through, take the loose ends of the yarn and pull them through the loop. Gently tighten it so the yarn cinches against the card. This creates a simple lark’s head knot that holds the yarn securely in place. It doesn’t slip out easily, but it can be removed later if needed.
📌 Tip: Handling Multiple Colors of the Same Yarn
If you have one yarn in multiple colors, you can store them on a single card in different ways. One option is to attach each color to a separate hole, which looks neat and visually appealing. I wanted to keep my cards compact, though, and I already record all color names in my Notion knitting journal. Instead of spreading colors across multiple holes or cards, I grouped several colors of the same yarn together by threading them through one hole. This keeps the card simple while still giving me a physical reference for the yarn.
Step 5: Label the Yarn Sample Card
Labeling is what turns these into a functional reference instead of just yarn scraps. I label each card with the brand name and yarn name, making the yarn name larger so it stands out.
When using a label maker, I trim the extra margin on both sides of the printed label. Most label tapes leave a lot of empty space, and cutting them down makes the card look cleaner.
📌 Tip: Shortening Long Brand Names
If a brand name is very long, I shorten it. For example, instead of writing “Knitting for Olive,” I use an abbreviated version that I made up. The goal is clarity, not formality—as long as I can recognize the brand later, it’s good enough.
Using DIY Yarn Sample Cards in Your Knitting Workflow
This approach keeps yarn sample cards easy to update without adding unnecessary structure or steps. By keeping the cards simple, they’re easy to update whenever you add new yarn to your stash or revisit older projects.
Used alongside digital records, yarn sample cards fit naturally into a knitting workflow. Digital tools are great for storing detailed information, while physical samples make it easier to compare yarns quickly and understand how they feel in real life. Each format does what it’s best at, without trying to replace the other.
This system is also flexible. You can adjust the card size, hole placement, labeling style, or even how many samples you attach based on how you organize your yarn. The most effective setup is the one that supports how you plan and knit, not the one that looks the most elaborate.
If you’ve been looking for a practical way to keep track of your yarn without adding complexity, DIY yarn sample cards are a simple place to start.
🧵 Must-Try Knitting Supplies & Ideas
🧶 Must-Try Knitting & Crochet Projects
- Bottom-Up Cardigan Knitting FO: My First Fall Project
- Last Knitting Project This Summer: Lightweight Sweater Pattern
- My Favorite Things: Camisole No.4 — Simple Camisole Knitting FO
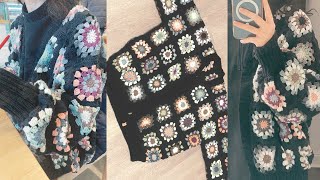
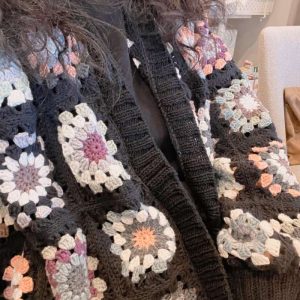
- Granny Square Cardigan FO: The Final Touches
- Modifying My Crochet Granny Square Cardigan for a Perfect Fit
- JHIA vs. TKGA: Which Knitting Certification Is Right for You?
- JHIA Knitting Certification: Is It Right for You?
- My Granny Square Cardigan Journey: Stitch by Stitch
Ready to start your next knitting project? Explore patterns, tutorials, and ideas for inspiration: Browse All Knitting & Crochet Projects
Explore More in Creativity


Latest Updates:


Featured Videos: