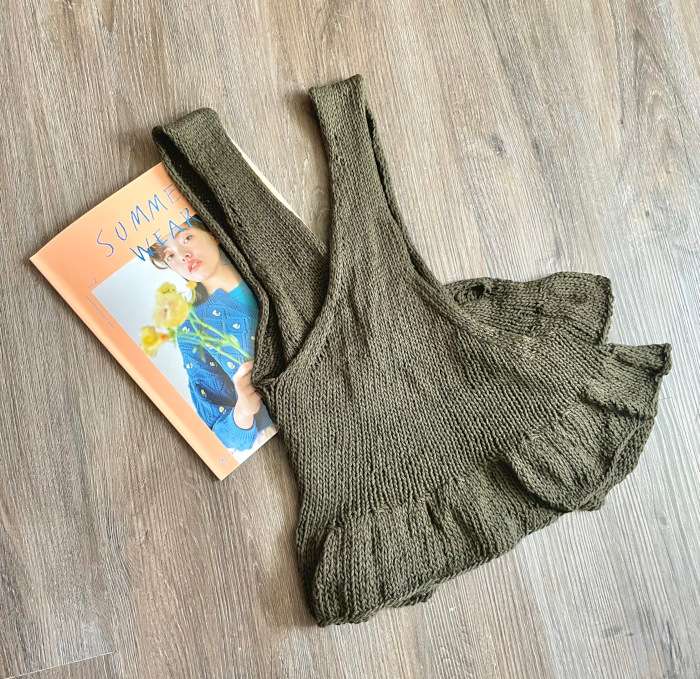
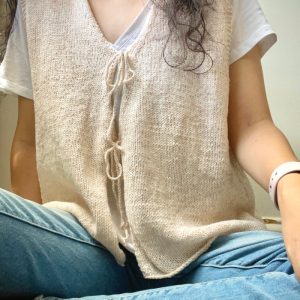
Frills V-Neck Tank Top Knitting Pattern (Summer Wear Vol.2)
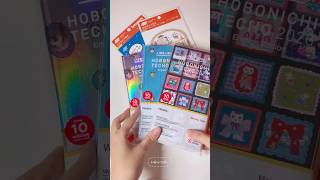
I recently started the Frills V-Neck Tank Top knitting pattern from Summer Wear Vol.2. After finishing the JLPT, I wanted to keep my motivation for studying Japanese alive in daily life. One way I’ve been doing this is by choosing projects from Japanese knitting books, where following the instructions helps me practice the language while enjoying my craft.
For this project, I picked the Frills V-Neck Tank Top as my first design from Summer Wear Vol.2. The clean V-neck shape and delicate frills felt like the perfect summer piece, and it gave me the chance to try a bottom-up construction with a sleeveless design.
📚 Keep Reading in This Series →
- My Favorite Things: Camisole No.4 — Simple Camisole Knitting FO
- Best Summer Knitting Top Pattern: Top Sol by MochiKnits
- Frills V-Neck Tank Top Knitting Pattern (Summer Wear Vol.2) (reading now)
- Last Knitting Project This Summer: Lightweight Sweater Pattern
- Bottom-Up Cardigan Knitting FO: My First Fall Project
Table of Contents
Project Info (Quick Facts)
- Duration: June 19 – July 23
- Pattern: Frills V-Neck Tank Top (Summer Wear Vol.2)
- Yarn: Ramie Cotton (170g)
- Needles: Chiaogoo Interchangeable Needles in US 7, 9 (equivalent to JP 7, 9)
- Method: Bottom-up, sleeveless tank top construction
This is a light and breathable project, meant to be layered over a simple T-shirt. Using the original yarn recommended in the book made the process easier, since I didn’t have to recalculate gauge or substitute fiber.
Why I Chose This Pattern
When I first flipped through Summer Wear Vol.2, this pattern stood out to me immediately. I’ve always liked garments that can be layered, especially something airy that adds texture over a simple T-shirt. I wanted a top that I could throw on casually but still feel stylish. I’ve made a couple of similar layering garments before as well, if you’d like to check them out:
Another reason was my curiosity about bottom-up knitting. I had mostly worked on top-down projects, and while I like that construction, I thought this was a good opportunity to try something different without too much pressure. Since the design doesn’t have sleeves, it felt less intimidating and manageable as my first bottom-up piece.
Lastly, I wanted to challenge myself with a Japanese knitting chart pattern. I still feel a bit inexperienced reading charts, but I was impressed with how clearly the instructions were written in this book. Everything was laid out in full charts rather than step-by-step text, so I had to carefully read ahead and plan the knitting order. It required some patience, but it also gave me confidence to rely on symbols instead of words.
Knitting Process
I’ve shared the full making video on my blog if you’d like to see the process in action!
Swatch and Gauge
Before casting on, I made a swatch with the Ramie Cotton yarn. My gauge came out fairly close to the pattern’s recommendation, so I decided to stick with the same needle sizes. Because this is a Japanese pattern, I checked the conversion between Japanese and US needle sizes. Luckily, JP 7 and 9 correspond close to US 7 and 9, so I didn’t have to worry about confusion.
Cast-On Challenges
The most challenging part of this entire project might have been the very beginning: casting on more than 300 stitches for the bottom frill. I had to attempt it three times.
- First attempt: I misjudged the tail and left it way too long, which made it frustrating to handle.
- Second attempt: I managed the tail better, but the stitches twisted when I joined in the round, so I had to frog it.
- Third attempt: I got everything aligned, but my tail was too short this time, and I ended up five stitches short. Instead of ripping back again, I filled in the missing stitches with a knitted cast-on.
It was a little rough to start with, but once I got past the cast-on, the knitting flowed smoothly.
Needle Transition
The frill section at the bottom was knit with JP 9 (US 9) needles, which gave it a nice drape. Once that was done, I switched down to JP 7 (US 7) for the body to create a firmer fabric. This transition helped define the shape and gave the top structure.
Body and Shoulders
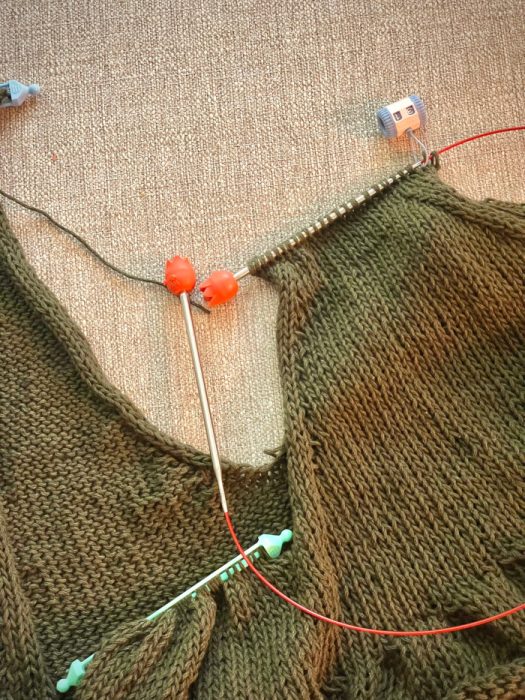
The body was knit in the round up to the underarm, then divided into back and front. I started with the back panel, shaping the shoulders by gradually decreasing stitches. After completing the back, I placed the stitches on a holder.
I actually enjoyed this part more than I expected. I had bought some stitch holders during a trip to Japan, and finally using them felt oddly satisfying. Then I moved to the front, knitted up to the shoulder, and joined everything together.
Fit Surprise
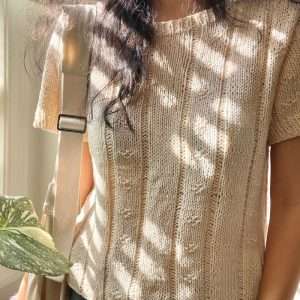
One surprise was the sizing. Even though my gauge swatch matched, the body turned out slightly larger than expected. The pattern already has a relaxed fit, so at first I worried it would look oversized in an uncomfortable way. I debated whether to rip back and adjust, but in the end I decided that looser is better than too tight. It turned out to be the right choice—once I tried it on, the oversized fit gave it a casual, comfortable vibe that works well for layering.
Fit & Adjustments

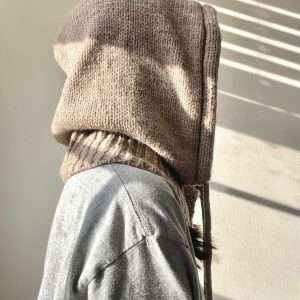
Overall, the fit leans toward oversized with deep armholes and a low neckline, true to its bustier-style design. The frills add just enough feminine detail without being over the top.
I didn’t make major adjustments except for that little cast-on fix. If I knit this again, I might shorten the length slightly or experiment with a different yarn that has more drape. But for my first attempt from Summer Wear Vol.2, I’m happy with the result.
Yarn Review: Ramie Cotton
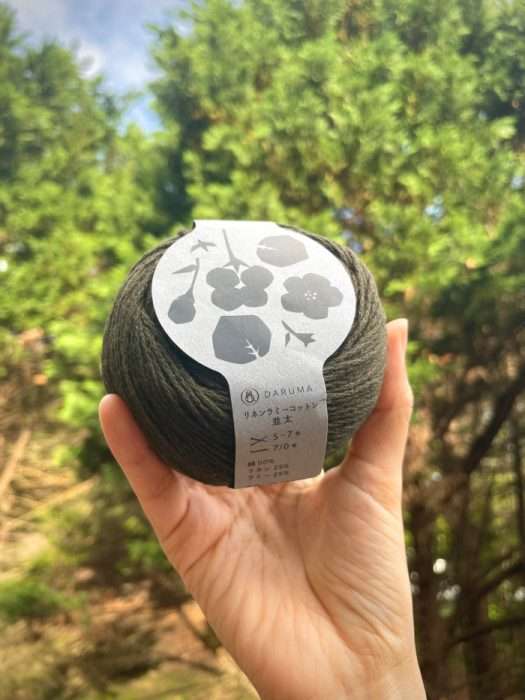
Since I used the original yarn, I want to share some thoughts about Ramie Cotton.
- Texture: The yarn feels somewhat stiff while knitting, which is typical for cotton. It’s not as soft as merino, so I find it more comfortable to wear over a T-shirt rather than directly against my skin.
- Stitch Definition: Excellent stitch definition—lace and frills pop out cleanly.
- Durability: After washing, the fabric didn’t shrink much. It relaxed slightly, which made the fit feel even more comfortable.
- Drawbacks: There was noticeable fiber shedding during knitting and even in the wash. The yarn isn’t fuzzy, but the shed fibers were visible on my desk and hands.
One nice surprise was how well it worked with my Chiaogoo steel needles. The yarn didn’t slip excessively but still glided smoothly, making the process easy.
Where I Bought the Yarn
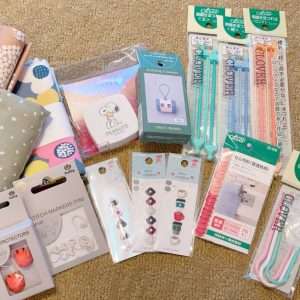
I purchased the yarn on Etsy from a shop called cucuaknit. Since it was shipped from Japan, it took a little extra time to arrive, but the experience was worth it. The seller included an extra ball of yarn for free and provided excellent customer service throughout the process. I’d definitely recommend this shop if you’re looking for Japanese yarns.
Takeaways & Tips
Knitting this tank top taught me several things that may help other knitters:
- Bottom-up knitting: If you want to try this method, a sleeveless top is a great starting point. It avoids the complexity of sleeves but still teaches you the construction flow.
- Japanese chart reading: Spend time studying the entire chart before you cast on. Knowing what decreases and shaping are coming up prevents mistakes.
- Large cast-ons: For projects with 300+ stitches, use markers at intervals (every 20 or 50 stitches). It saves time if you miscount.
- Gauge confidence: Even if your swatch matches, be prepared for slight differences in fit. Sometimes the yarn relaxes differently in a large piece.
Conclusion
Knitting the Frills V-Neck Tank Top knitting pattern from Summer Wear Vol.2 was a rewarding project. The biggest hurdle was the cast-on, but once that was behind me, the rest of the knitting was straightforward and enjoyable.
I love how the finished piece works as a layering item, especially for the transition seasons. The oversized fit turned out to be a blessing rather than a problem, making it comfortable and versatile.
Would I knit this again? Possibly, especially if I want to experiment with a softer yarn. For now, I’m simply glad I challenged myself with a Japanese chart pattern and got to practice reading knitting instructions in Japanese. It gave me confidence to try more designs from Summer Wear Vol.2.
If you’re looking for a light, wearable summer project and want to explore bottom-up construction, I highly recommend giving this pattern a try.
🧶 Must-Try Knitting & Crochet Projects
- Bottom-Up Cardigan Knitting FO: My First Fall Project
- Last Knitting Project This Summer: Lightweight Sweater Pattern
- My Favorite Things: Camisole No.4 — Simple Camisole Knitting FO
- Granny Square Cardigan FO: The Final Touches
- Modifying My Crochet Granny Square Cardigan for a Perfect Fit
- JHIA vs. TKGA: Which Knitting Certification Is Right for You?
- JHIA Knitting Certification: Is It Right for You?
- My Granny Square Cardigan Journey: Stitch by Stitch
Ready to start your next knitting project? Explore patterns, tutorials, and ideas for inspiration: Browse All Knitting & Crochet Projects
🧵 Must-Try Knitting Supplies & Ideas
Explore More in Creativity


Latest Updates:


Featured Videos: