Granny Square Cardigan FO: The Final Touches
Project Duration of Crochet Granny Square Cardigan: March 2024 – January 9, 2025
Linking Back: The Full Journey
Before diving into the details, here are the previous posts that capture the evolution of this project:
- Initial Inspiration & Yarn Choices (March 2024):
My Granny Square Cardigan Journey: Stitch by Stitch - Mid-Project Challenges & Pattern Tweaks (December 2024):
Modifying My Crochet Granny Square Cardigan for a Perfect Fit
These posts will give you insight into the ups and downs I faced along the way. Now, let’s pick up where we left off.
Are you looking for an easy-to-follow granny square cardigan project that combines the timeless appeal of crocheted motifs with a warm, modern twist? In this post, I’ll share how I wrapped up my own crochet granny square cardigan by following (and modifying) a tried-and-true granny square cardigan pattern. I also added finishing touches using luxurious merino wool yarn. If you’ve been wanting to try a DIY crochet cardigan that’s both eye-catching and snug, please keep reading! I’m excited to walk you through every step of my crafting journey, including lessons learned and tips for making your own.
I’ve also added a vlog video if you’d like to see the full process!
📚 Keep Reading in This Series →
Table of Contents
From the First Stitch to November
I kicked off this cardigan in March 2024, detailing my yarn choices and initial plans in My Granny Square Cardigan Journey: Stitch by Stitch. Life soon got busy, and from April to October, my granny squares sat untouched. But by late November, I was ready to jump back in, bringing fresh ideas about layout and color. I shared these updates in December’s Modifying My Crochet Granny Square Cardigan for a Perfect Fit, where I switched to a single bold edging color and reconsidered my square count to achieve the comfortable, oversized look I envisioned.
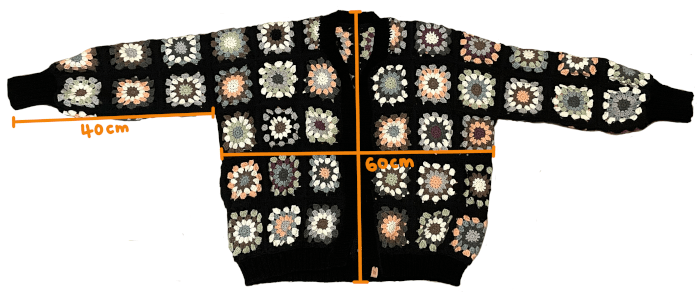
Modification 1: From 45 Squares to 70
It turns out my suspicions about needing more squares were right. Once I took fresh measurements, I realized 45 squares wouldn’t be enough for the relaxed, roomy shape I envisioned. By adding a few squares to the width and a few more to the length, I landed on a new total of 70 granny squares. This might sound like a daunting number, but it ultimately gave me the comfortable fit I wanted. If you’re taking on a granny square cardigan yourself, I recommend:
- Overestimate: Always assume you’ll need extra squares. It’s simpler to have a few spare motifs than to realize you’re short near the end.
- Measure Frequently: Drape your squares over yourself or a dress form to see how they align. Remember that the finished cardigan will gain some structure once seamed and blocked.
- Stay Flexible: Don’t panic if your vision changes halfway through. It’s okay to shift your plan to suit your body measurements and personal style.
Increasing from 45 to 70 squares required more time and yarn, but I’m so glad I took the leap. The extra fabric drapes nicely and makes for a cozy layering piece—exactly what I wanted for when cooler weather arrived.
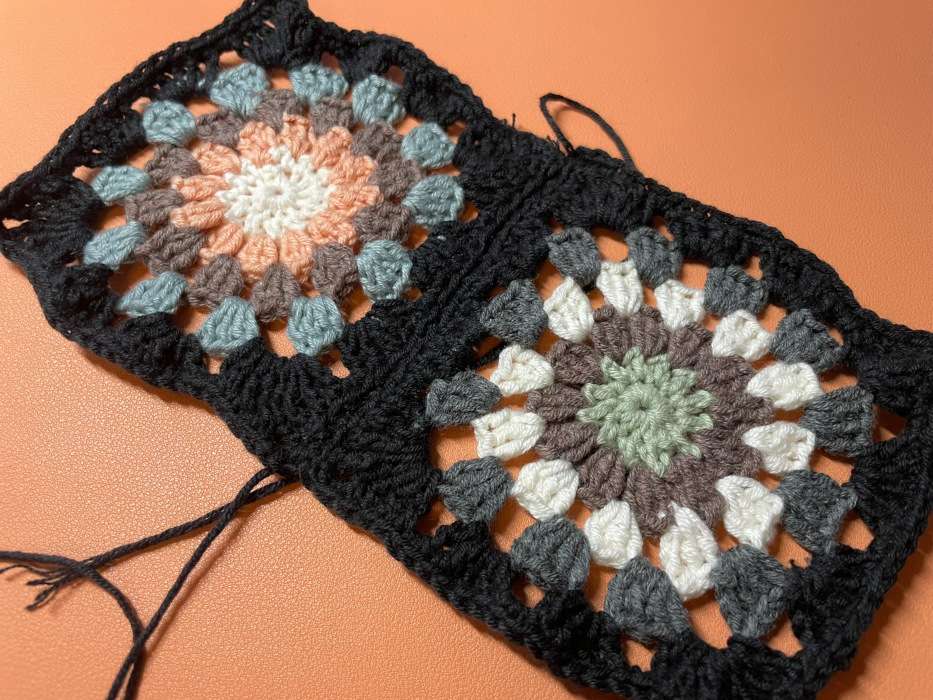
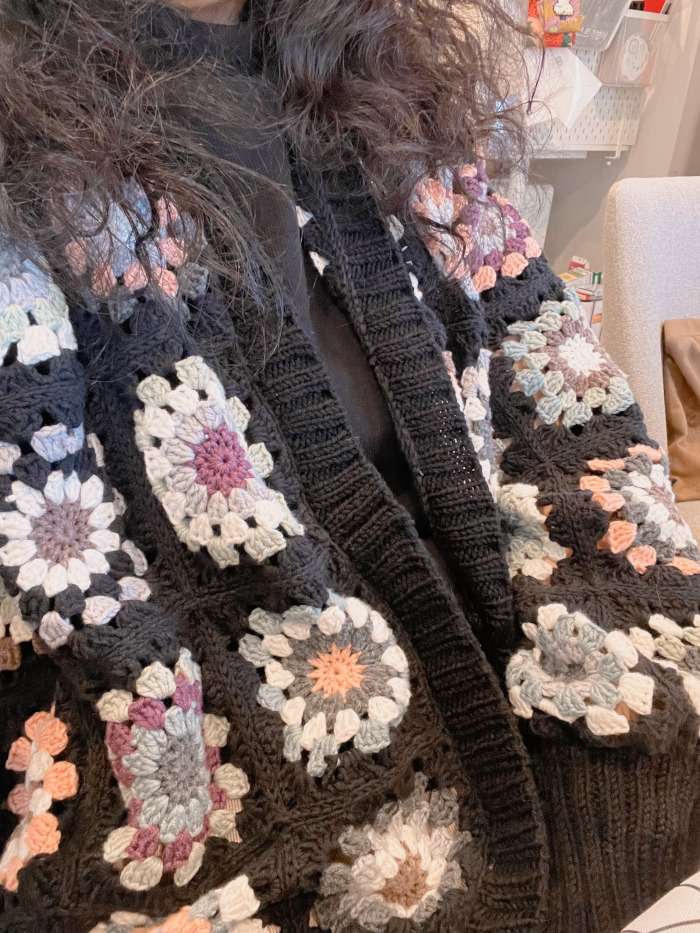
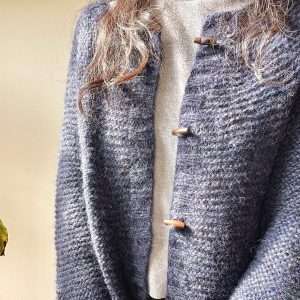
Modification 2: Choosing Black for the Edging
One of the biggest visual decisions I made was switching to black edging. Originally, I planned to keep each square’s edging colorful and unique, but I found that a bold, dark contrast really showcased the individual motifs. Each granny square seemed more defined, and the overall piece took on a polished, cohesive look. With black yarn, even the brightest squares looked more balanced, and it tied the different shades together perfectly.
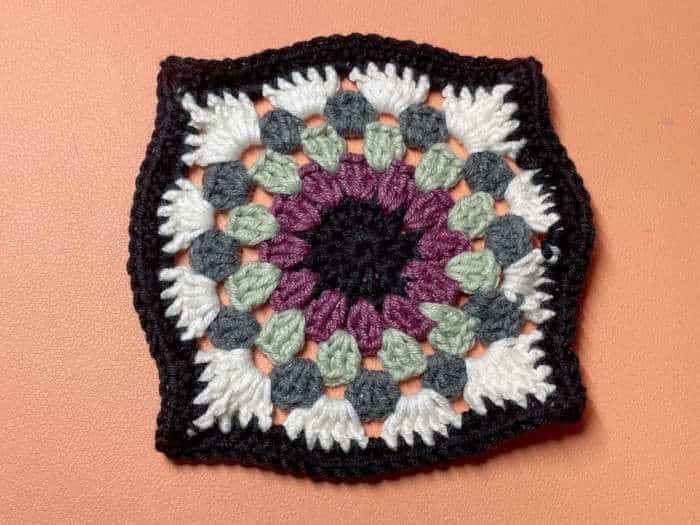
When experimenting with edging colors, it helps to test a couple of squares side by side. Crocheting a small swatch of black edging on a single granny square gave me a quick preview of how it would look on the entire garment.
Cotton Yarns vs. Merino Wool Yarn
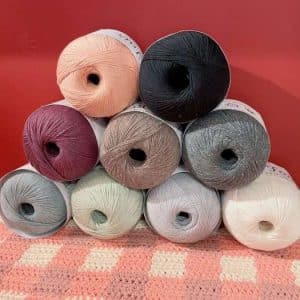
In my March 2024 post, I mentioned that the main yarn for my granny squares was Premier Cotton Fair—a relatively lightweight cotton-acrylic blend that offers good drape and breathability. However, as the cardigan grew from the originally planned 45 squares to a final count of 70, I noticed the overall weight creeping up more than I’d anticipated. This became a concern when I considered adding merino wool yarn for the sleeves, bottom hem, and button bands—would it make the cardigan too heavy?
In the end, I decided the cozy warmth and softness of merino outweighed my worries about extra heft. I chose this Merino Wool Yarn for the finishing details, focusing on high-contact areas that benefit most from warmth and elasticity. By keeping the granny squares in cotton and using merino only for trim and ribbing, I struck a happy medium—light enough for comfortable wear, yet wonderfully snug where it matters most.
Benefits of Merino Accents
- Softness: Merino wool is famously gentle on the skin, making it perfect for cuffs and necklines that rub against your wrists or collar.
- Warmth: If you live in a colder climate, merino provides an insulating layer that helps retain body heat.
- Shape Maintenance: Using a slightly more elastic yarn for ribbed sections (like a 2×2 rib) means those areas will keep their shape longer, even with frequent wear.
Modification 3: The Sleeves and 2×2 Ribbing
With the body assembled, I turned my attention to the sleeves, bottom hem, and button band. This is where the merino wool yarn really stole the show. Instead of crocheting more granny squares or continuing a single crochet border, I decided on a 2×2 rib for a snug, sweater-like finish. Here’s why I love 2×2 ribbing:
- Stretch Factor: A 2×2 rib provides enough elasticity for comfortable movement, especially around the wrists and waist.
- Polished Look: Ribbing creates a visually pleasing edge that resembles knitted garments.
- Practical Warmth: A ribbed cuff helps trap heat around your wrists, which is surprisingly helpful on chilly days.
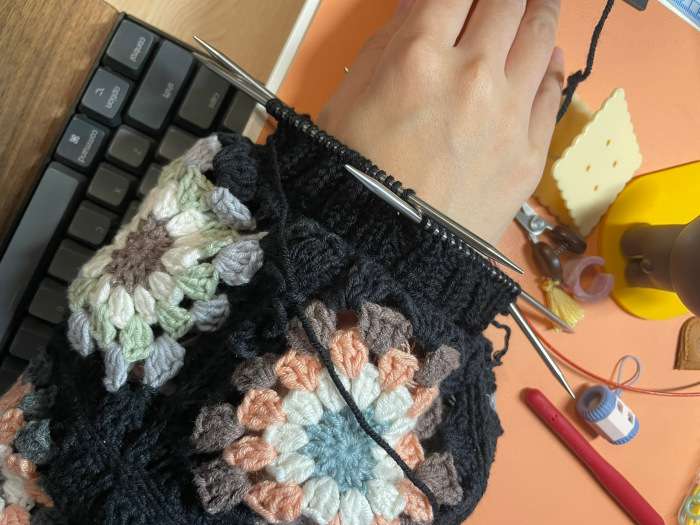
Working the ribbing with merino wool yarn also introduced a subtle softness that stands apart from the main yarn. Whenever I slip on this cardigan, I immediately notice the gentle, cozy feel around my wrists and waist—a small but meaningful detail that makes the cardigan extra special.
Reflections & Tips for a DIY Crochet Cardigan
One of the biggest lessons I learned is that it’s okay to set things aside when life intervenes. Between April and October, I barely touched my granny squares, worried I’d never finish. Yet stepping back proved a blessing: when I returned in November, I had fresh ideas—like using a single color for edging and watching the final weight closely. Sometimes a little distance offers just the perspective you need to make better choices and rekindle your enthusiasm.
- Choose the Right Main Yarn
Opt for a yarn that balances weight, drape, and color. If you’re working on many motifs, a lighter yarn can keep the garment from becoming too heavy. - Experiment with Edging
Test different colors or techniques on a single square first—saves you the hassle of frogging an entire cardigan’s worth of edging. - Consider Accent Fibers
Adding a luxury yarn like merino or alpaca for cuffs and hems brings extra warmth and softness without needing a massive quantity. - Map Out Your Layout
Lay your squares on the floor to figure out color distribution and spot potential sizing issues before you start seaming. - Stay Flexible
Projects evolve. Don’t be afraid to change your plan mid-crochet if a fresh idea makes more sense. - Block Thoroughly
A light spritz with water or steam, plus careful pinning, helps relax stitches and give your cardigan a smooth, consistent drape—especially important for multiple motifs. - Taking Breaks Can Spark New Ideas
Time away helped me decide on that stunning black edging—it can do the same for your stalled projects!
The Final Result: A Cozy Success
After assembling 70 squares, adding black edging, and finishing with merino wool accents, I officially completed my cardigan on January 9, 2025. At 586 grams, it’s on the heavier side for a crocheted garment—but it still feels comfortable to wear. The final measurements came out to 60 cm from top to bottom, 60 cm across the width, and 40 cm for the sleeves, giving me just the right amount of ease without feeling bulky.
I love how the black edging frames the bright colors, and the soft ribbing at the cuffs and hem provides just the right amount of warmth and stretch. Ultimately, the cardigan captures everything I hoped it would: a blend of old-school charm from the granny squares, modern comfort thanks to merino details, and a personal touch that only a DIY crochet cardigan can offer.
Looking Ahead
Now that this project is finally complete, I’m already brainstorming my next crochet endeavor. Perhaps I’ll try a different motif, or maybe I’ll play around with color-blocking in a future garment. One thing’s for sure: I’ll carry forward the lessons from this journey—be flexible, stay patient, and don’t be afraid to let a project evolve. Sometimes, the best parts of a piece emerge from improvisation and experimentation.
Thank you so much for following along. I hope my experience inspires you to pick up your hook and yarn, whether it’s to start your own crochet granny square cardigan or some other crafty dream. If you have any questions or want to share your progress, feel free to leave a comment or reach out on social media. Happy crocheting, and here’s to many more cozy, handmade pieces!
🧶 Must-Try Knitting & Crochet Projects
- Bottom-Up Cardigan Knitting FO: My First Fall Project
- Last Knitting Project This Summer: Lightweight Sweater Pattern
- My Favorite Things: Camisole No.4 — Simple Camisole Knitting FO
- Granny Square Cardigan FO: The Final Touches
- Modifying My Crochet Granny Square Cardigan for a Perfect Fit
- JHIA vs. TKGA: Which Knitting Certification Is Right for You?
- JHIA Knitting Certification: Is It Right for You?
- My Granny Square Cardigan Journey: Stitch by Stitch
Ready to start your next knitting project? Explore patterns, tutorials, and ideas for inspiration: Browse All Knitting & Crochet Projects
🧵 Must-Try Knitting Supplies & Ideas
Explore More in Creativity


Latest Updates:


Featured Videos: