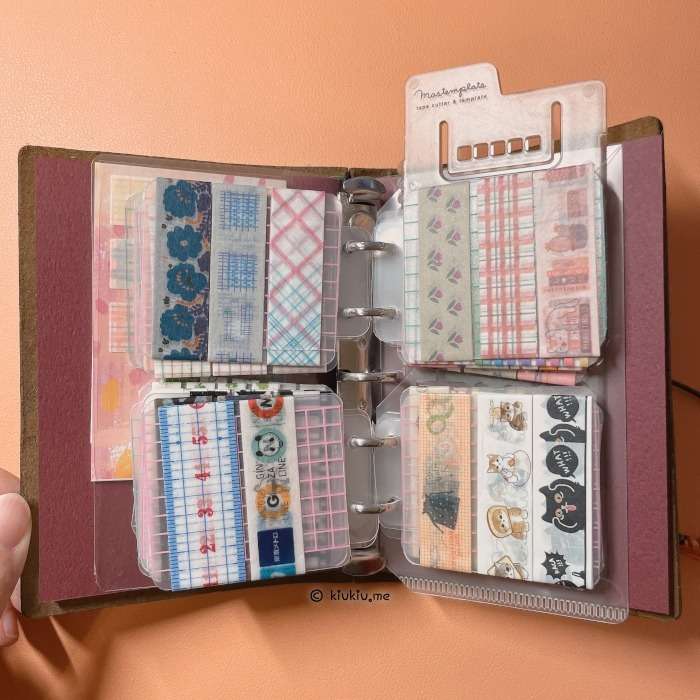
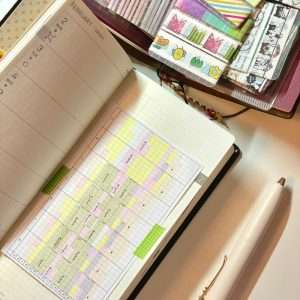
DIY Washi Tape Binder with Travelers Notebook
Have you ever found yourself fumbling through a drawer full of washi tape rolls, wishing you could have your favorite designs at your fingertips wherever you go? If you’re a stationery enthusiast or a frequent traveler, maintaining an organized collection of washi tapes can significantly enhance your creative projects and journaling experience. That’s why I decided to create a DIY washi tape binder for portable organization, seamlessly integrated into my traveler’s notebook. This portable washi tape binder not only keeps my washi tapes neatly organized, but also makes them easily accessible on the go. In this comprehensive guide, I’ll walk you through the process of crafting your own washi tape binder, perfect for enhancing your traveler’s notebook washi tape customization and keeping your creative tools organized.
I’ve also added a short video if you’d like to see the full flip-through!
Table of Contents
Why Create a DIY Washi Tape Binder?
As part of my traveler’s notebook customization, I wanted a practical solution to store a small assortment of washi tapes in one convenient location. Traditional storage methods can be bulky and disorganized, making it challenging to find the right tape when you need it. By creating a DIY washi tape binder, I not only achieved a streamlined organization system but also enhanced the portability of my washi tape collection. This project is ideal for anyone looking to:
- Organize Washi Tapes: Keep your favorite washi tapes in one place, reducing clutter and making selection easier.
- Enhance Portability: Carry your washi tape collection effortlessly with your traveler’s notebook, perfect for on-the-go creativity.
- Customize Your Notebook: Add a personal touch to your traveler’s notebook by integrating a customized washi tape binder that reflects your style.
Materials You’ll Need
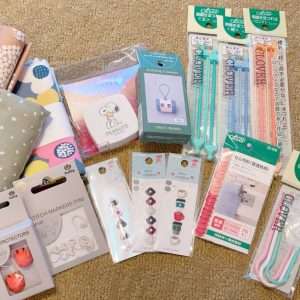
Before diving into the crafting process, ensure you have all the necessary materials. Gathering everything in advance will make the project smoother and more enjoyable.
- A Sheet of A4 Clear Folder (Link): This serves as the base for your washi tape binder, providing a clear and sturdy structure.
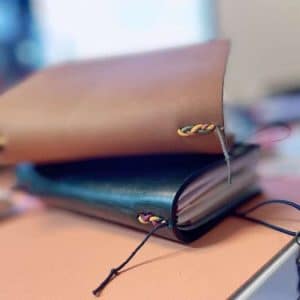
- Traveler’s Notebook in Passport Size: Choose a size that fits comfortably in your bag and allows for easy customization.
- A7/M5 Binder Ring in 15mm (Link): This binder ring will hold your washi tape sample boards together.
- Washi Tape Sample Boards (Link): These boards provide a surface to display and store individual washi tape rolls.
- Ruler: For precise measurements and cutting.
- Scissors: To cut the materials to the required sizes.
- Double-Sided Tape: To securely attach components without visible adhesive.
- Your Favorite Washi Tapes: Select a variety of colors and patterns that inspire you.
Step-by-Step Instructions
Creating your DIY washi tape binder involves several detailed steps. Follow each one carefully to ensure a professional and functional end product.
1. Prepare the Clear Folder Sheet
Start by cutting a sheet of the A4 clear folder to the size of 15.5 x 12.5 cm. This trimmed sheet will act as the foundational base of your washi tape binder. Accurate measurements are crucial to ensure the binder fits seamlessly into your traveler’s notebook.
💡Use a ruler and pencil to mark your measurements before cutting to ensure precision. For cleaner and more accurate cuts, a paper cutter (Link) works even better than scissors, providing straight edges and saving time.
2. Create the Binder Ring Attachment
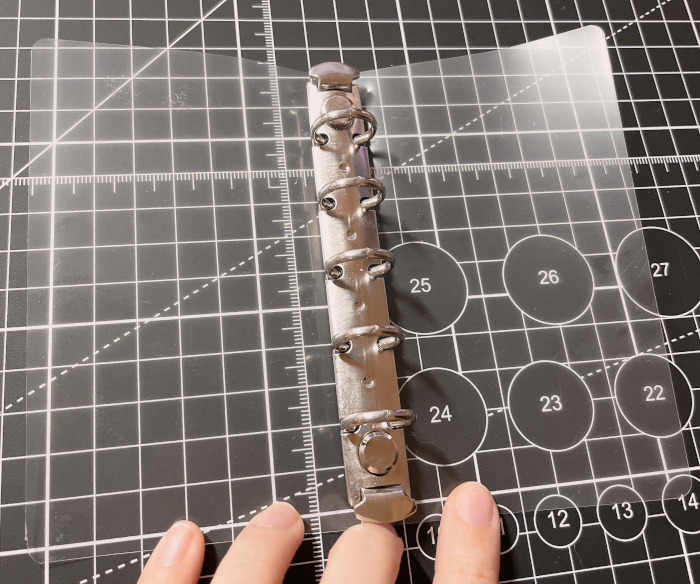
Next, you’ll need to attach the binder ring, which will hold all your washi tape sample boards together.
- Cut Small Holes: Carefully cut two small holes in the center of the clear folder sheet. These holes should be evenly spaced to allow the binder ring to be attached securely.
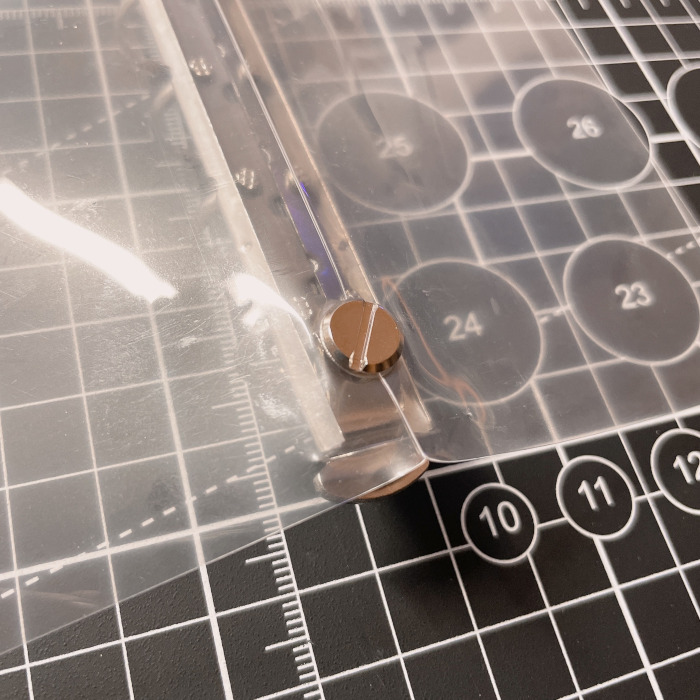
- Attach the Binder Ring: Thread the 15mm binder ring through the holes. This ring will serve as the spine of your binder, keeping all the washi tape samples organized in one place.
💡Use a hole punch for cleaner and more uniform holes, ensuring the binder ring fits snugly.
3. Trim the Washi Tape Sample Boards
Your washi tape sample boards need to be resized to fit within the binder.
- Cut to Size: Trim each washi tape sample board down to 5.5 cm in length. This size is ideal for displaying the tapes without taking up excessive space.
💡Measure each cut carefully to maintain consistency across all sample boards.
4. Make Small Clear Rectangular Pieces
These flat rectangles will serve as connectors to attach the sample boards to the binder ring, making it easy to insert or remove them as needed.
- Cut Remaining Clear Folder: Use the leftover clear folder material to cut small rectangles measuring 3 x 4 cm. You will need multiple pieces, depending on the number of washi tapes you plan to store.
💡Cut these rectangles from the edge of the clear folder right up to where the holes will be punched. This method ensures they can be easily removed from the binder without fully opening it when you need to reorganize your collection.
💡Cut a few extra rectangles to accommodate future additions to your washi tape collection.
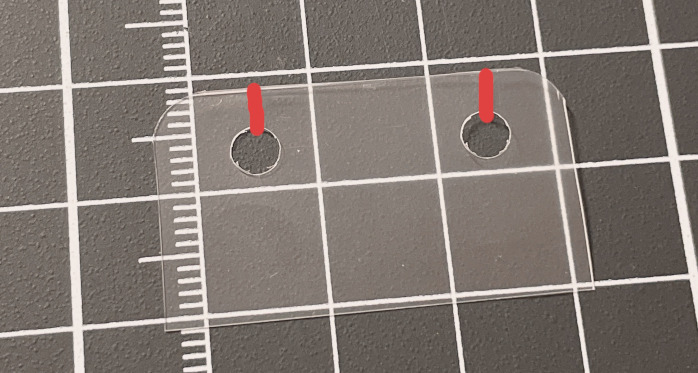
5. Punch Holes in the Rectangles
To ensure that the rectangular pieces can be attached to the binder ring along with the sample boards, you need to punch holes in each one.
- Punch Two Holes: For each 3 x 4 cm rectangle, punch two small holes near one edge. These holes will allow the rectangle to be threaded onto the binder ring along with your sample boards.
💡Use a consistent hole size and spacing to maintain uniformity across all rectangles. Aligning these holes correctly will make it easier to insert and remove the rectangles as needed, aiding in quick reorganization.
6. Attach Connectors to the Sample Boards
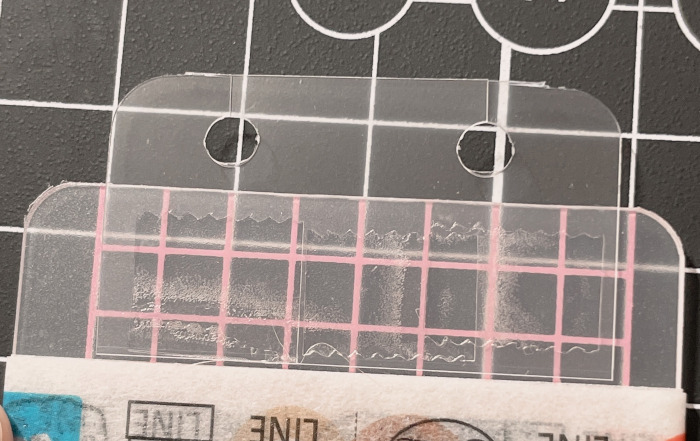
Now it’s time to secure the flat rectangular connectors to the sample boards.
- Use Double-Sided Tape: Apply double-sided tape to the back of each 3 x 4 cm rectangular connector. This adhesive will hold them firmly in place without showing any tape.
- Align the Holes: Ensure that the holes in the rectangular connectors align with those in the sample boards. This alignment is essential for the binder ring to pass through smoothly.
- Secure Attachment: Press the rectangular connectors firmly onto the sample boards near one end, making sure they are straight and evenly spaced.
💡Position the connectors near one end of the sample boards to leave ample space for wrapping the washi tape.
7. Wrap the Washi Tape
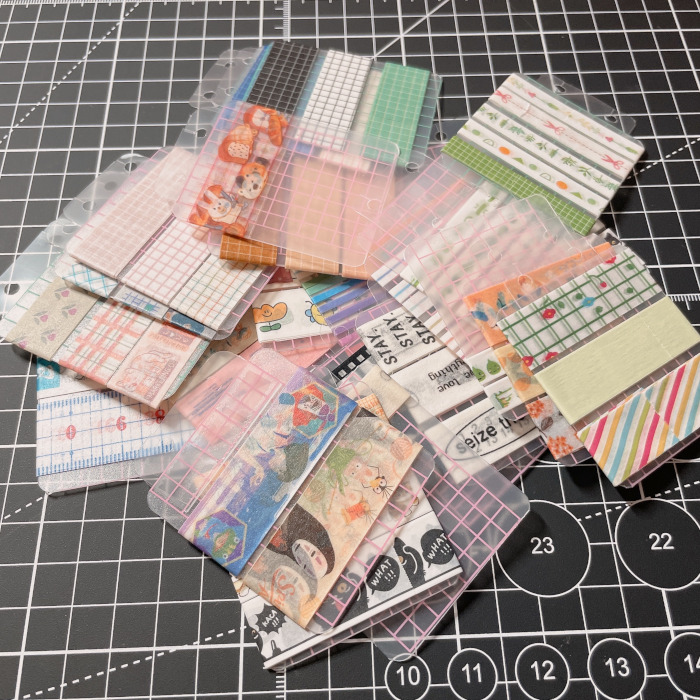
With the connectors attached, you can now begin adding your washi tapes.
- Start at One End: Begin wrapping the washi tape neatly around the board, starting at one end. Ensure the tape is smooth and free of wrinkles.
💡Arrange the tapes by color, pattern, or theme to create an aesthetically pleasing display.
💡Don’t wrap too tightly, as the sample board may bend. This gentle approach prevents warping or damage to the board while securing the tape in place.
8. Assemble the Binder
Once all your sample boards are ready with their respective washi tapes, it’s time to bring everything together.
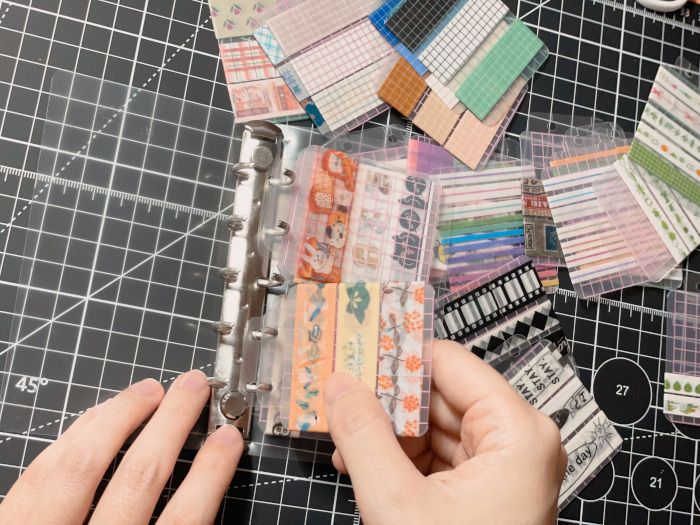
- Insert into Binder Ring: Slide each sample board with attached connectors onto the binder ring, ensuring they are evenly spaced and can flip through easily.
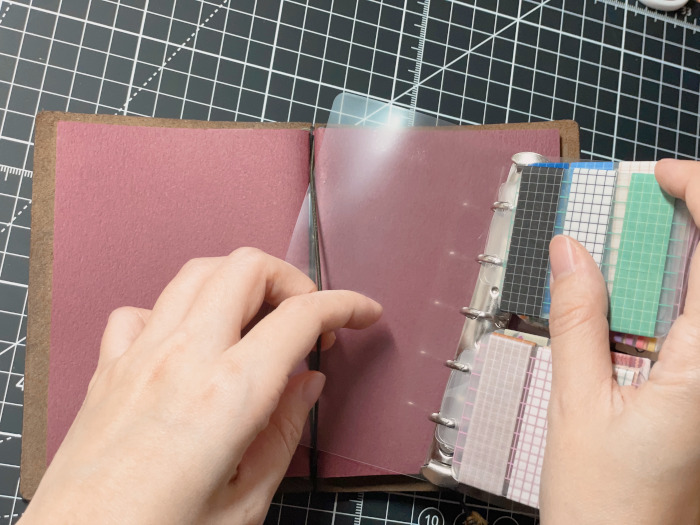
- Place in Traveler’s Notebook: Open your traveler’s notebook and insert the completed washi tape binder into a designated pocket or section. This integration keeps your washi tapes accessible and adds a personalized touch to your notebook.
Tips & Tricks for an Enhanced Washi Tape Binder
To make your DIY washi tape binder even more functional and personalized, consider the following tips:
Customize Your Layout
Organize the sample boards in a way that suits your creative workflow. Whether you arrange them by color gradient, pattern type, or usage frequency, a customized layout can make selecting the right tape quicker and more intuitive.
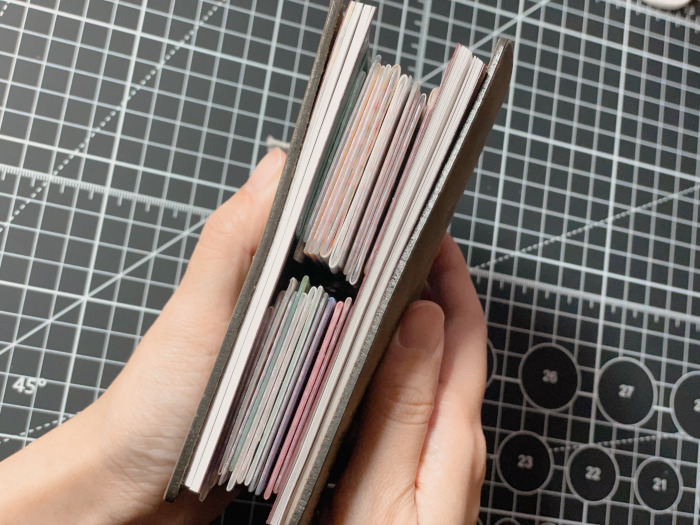
Keep It Flexible
As your washi tape collection grows, you might need to add more sample boards. Ensure your binder has some extra space or consider using additional binder rings to accommodate new additions without overcrowding.
Benefits of a DIY Washi Tape Binder
Creating your own washi tape organizer offers numerous advantages:
- Cost-Effective: DIY projects are often more affordable than purchasing pre-made organizers, allowing you to allocate funds to expanding your washi tape collection.
- Personalization: Tailor the binder to your specific needs and aesthetic preferences, ensuring it complements your traveler’s notebook and personal style.
- Sustainability: Reusing materials like clear folders and binder rings reduces waste and promotes environmentally friendly crafting practices.
- Skill Enhancement: Engaging in DIY projects enhances your crafting skills and fosters creativity, which can be applied to other organizational endeavors.
Common Mistakes to Avoid
To ensure your DIY washi tape binder turns out perfectly, be mindful of the following common mistakes:
Inaccurate Measurements
Precision is key when cutting materials. Double-check all measurements before making any cuts to avoid wasting materials and ensure a professional finish.
Overlapping Tapes
While slight overlaps are necessary to secure the tape, excessive overlapping can make the binder bulky and difficult to manage. Aim for a neat and consistent wrap.
Misaligned Holes
Ensure that the holes in the rectangular connectors, sample boards, and binder ring align correctly. Misaligned holes can make assembly challenging and may result in an unstable binder.
Skimping on Adhesive
Using insufficient adhesive can cause the boards to detach from the sample boards, leading to loose tapes. Apply enough double-sided tape to secure the rectangular connectors firmly.
Frequently Asked Questions (FAQs)
Q1: Can I use different sizes of binder rings?
A1: Yes, you can use different sizes of binder rings based on your preference. However, a 15mm binder ring is recommended for optimal durability and capacity.
Q2: What if I run out of space for more washi tapes?
A2: You can add additional sample boards or use multiple binder rings to accommodate a growing collection. Alternatively, consider using expandable binders that allow for more storage.
Q3: Is it necessary to use a clear folder?
A3: While a clear folder provides visibility and protection, you can experiment with other materials like fabric or colored cardstock to match your notebook’s theme.
Q4: Can I make a larger version of this binder?
A5: Absolutely! Adjust the measurements proportionally to create a larger binder that can hold more washi tapes or other small stationery items.
Conclusion
Creating a DIY washi tape binder for portable organization is a rewarding project that combines practicality with creativity. By integrating this binder into your traveler’s notebook, you not only keep your favorite washi tapes organized and accessible but also add a personalized touch to your journaling and creative endeavors. This project is perfect for stationery lovers, crafters, and travelers who value both functionality and aesthetics in their organizational tools.
Embrace the joy of crafting and enjoy the convenience of having your washi tapes neatly arranged and ready for use wherever your adventures take you. Whether you’re decorating a journal, planning a scrapbook, or adding flair to your planner, your customized washi tape binder will be an invaluable asset in your creative toolkit.
Happy crafting!
✂️ Must-Try Stationery DIY Projects
- Hobonichi Weeks 2026 Setup: How I Set Up My Planner for 2026
- Time Tracker for Hobonichi Weeks & A6 (Free Download)
- How I Set Up My Traveler’s Notebooks – Passport Size
- Best Hole Punch for Ring Binders: What Worked & What Didn’t
- DIY A7 Ring Binder Tutorial: Traveler’s Notebook-Inspired!
Looking for creative ways to personalize your stationery? Dive into all my Stationery DIY projects for step-by-step tutorials, unique ideas, and inspiration to elevate your journaling and crafting experience!
🖊️ Popular Stationery Reviews
- Uni-ball One P Refill Compatibility: The Best Gel Pen Setup with Signo
- Best 2026 Planners: Top Picks for Every Planning Style
- Hobonichi Weeks 2026 Review: Purchase & First Look
- Hobonichi Weeks vs Traveler’s Notebook: Which One Fits You?
- Hobonichi Techo 2026 Lineup: My Picks & What to Buy
Looking for the best stationery to enhance your journaling experience? Check out all my Stationery Reviews for detailed insights, product recommendations, and tips to help you choose the perfect tools for your creative projects!
Explore More in Creativity


Latest Updates:


Featured Videos: