Modifying My Crochet Granny Square Cardigan for a Perfect Fit
Continuing my Granny Square Cardigan Journey: If you missed the beginning, check out my first post here.
I’ve been working on creating a crochet granny square cardigan, and it’s been quite the journey! From adjusting the granny square cardigan pattern to figuring out how to adjust crochet cardigan size, I’ve learned so much along the way. I wanted to share my progress, the challenges I’ve faced, and the valuable lessons I’ve picked up in this crafting adventure.
📚 Keep Reading in This Series →
- My Granny Square Cardigan Journey: Stitch by Stitch
- Modifying My Crochet Granny Square Cardigan for a Perfect Fit (reading now)
- Granny Square Cardigan FO: The Final Touches
- Balaclava Knitting Pattern: My Cozy FORMI Balaclava Project
- My Favorite Things: Camisole No.4 — Simple Camisole Knitting FO
Table of Contents
The Motif Miscount
Let’s start with the first hiccup: the motif miscount. Initially, I calculated that I needed 44 granny square motifs for the cardigan. I was feeling confident as I crocheted each square, watching the pile grow. But as I began to lay them out and plan the assembly, I realized something was off. A quick recount revealed that I actually needed 46 motifs. Oops! It’s funny how even a small miscalculation can throw things off in a big way.
This was a minor setback, but it taught me an important lesson about double-checking my work, especially when numbers are involved. Crochet often involves a lot of counting and measuring, and it’s easy to make a small error that can have a ripple effect on the entire project.
Sizing Surprises
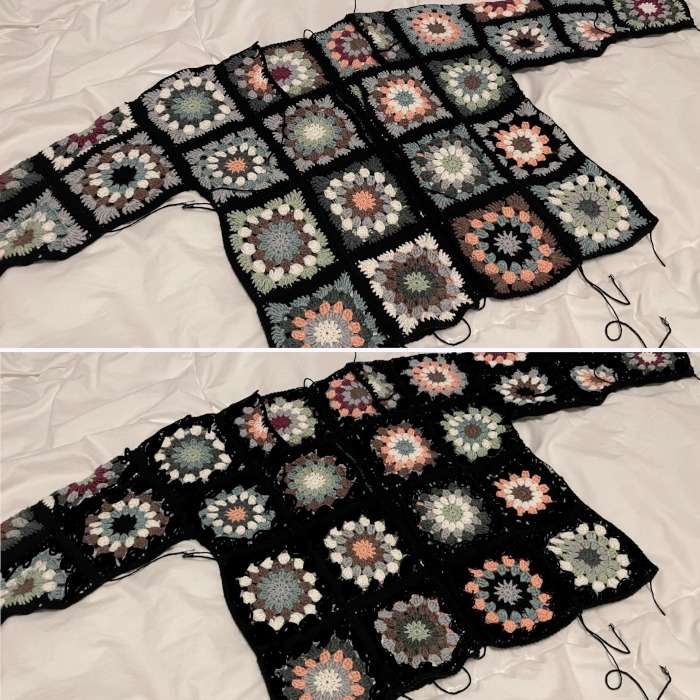
As I started piecing everything together, I noticed another issue—the cardigan was shaping up to be much smaller than I’d anticipated. The tutorial I was following didn’t specify the size of each granny square, just the overall dimensions of the finished piece. According to the tutorial, the cardigan should measure 54–55 cm in width and 55–57 cm in length.
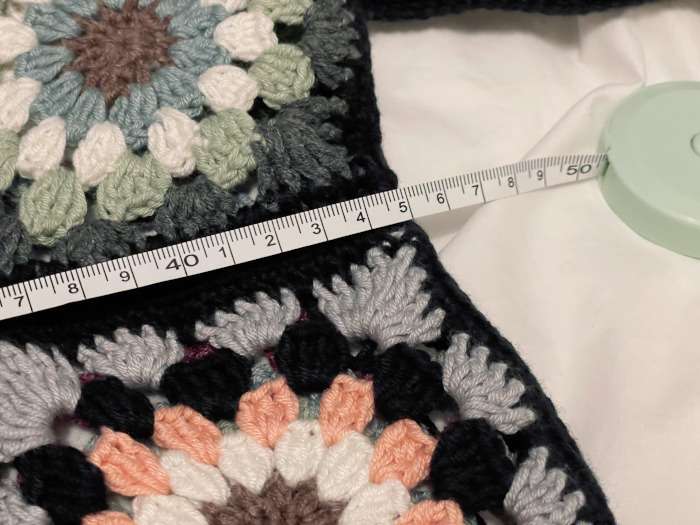
When I measured mine, both the width and length were about 10 cm smaller than those in the tutorial. That meant my cardigan was approximately 44–45 cm wide and 45–47 cm long. Considering I wanted my cardigan to be even larger than the tutorial’s dimensions, this was a significant discrepancy.
How to Adjust Crochet Granny Square Cardigan Size
Faced with this dilemma, I had to figure out how to adjust the crochet cardigan size to meet my expectations. Since the motifs were only “roughly” connected, I had the opportunity to make changes without too much hassle. I laid out the existing motifs and did some recalculations.
To achieve the size I wanted, I realized I needed to add about 30 more motifs. This would not only match the tutorial’s dimensions but also give me the extra room I desired for a comfortable, oversized fit. It was a bit daunting to think about crocheting 30 additional squares, but I was determined to make this cardigan just right.
Modifying the Granny Square Cardigan Pattern
The next challenge was the sleeves. The original sleeve design from the tutorial started with three granny square motifs at the upper arm, transitioned to a combination of one full motif and three-quarter motifs at the elbow, and narrowed down to two motifs near the wrist. This tapering effect is common in garment design, but when I saw it in person, I wasn’t thrilled with the look of the three-quarter motifs. They just didn’t match the aesthetic I was going for.
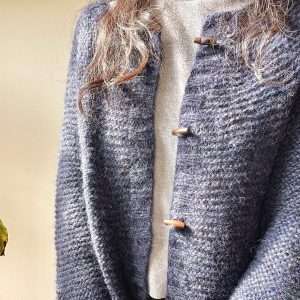
Balloon Sleeves?
I decided to modify the granny square cardigan pattern to feature sleeves with a consistent number of motifs all the way down, aiming for a balloon sleeved cardigan. Balloon sleeves are voluminous and add a dramatic flair to any garment. To achieve this, I planned to use the same number of motifs from the upper arm to the wrist, creating a fuller sleeve that gathers at the cuff.
This meant redoing some of the motifs specifically for the arms and adjusting the assembly plan. It was more work, but I was excited about customizing the cardigan to better suit my style. After all, one of the joys of crocheting your own clothing is the ability to tailor it to your preferences.
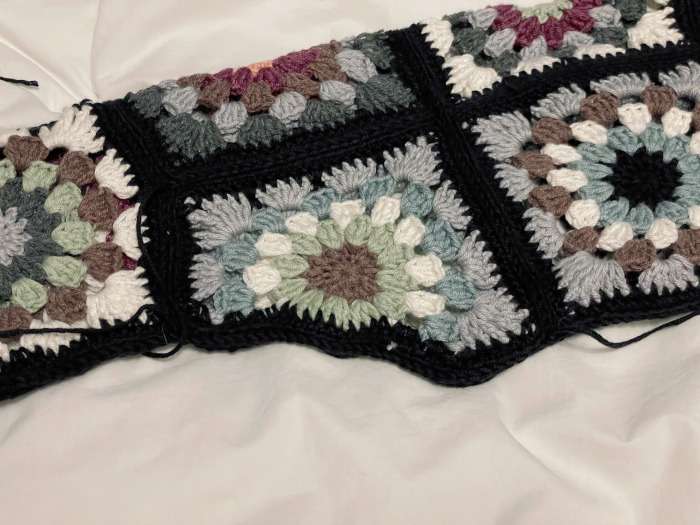
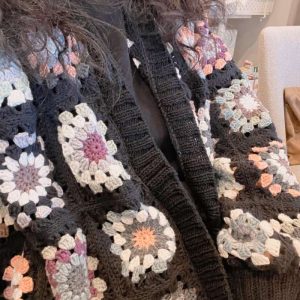
Color Considerations
Perhaps the most significant hurdle was the color scheme. Each motif featured five different colors and was bordered with black. While I loved the vibrant look of the multi-colored squares, I noticed that the last color before the black border didn’t sit right with me. The edges didn’t look as clean as I’d hoped, and the motifs didn’t have the cohesive look I was aiming for.
I realized that I expected more black to be prominent once all the motifs were connected. The black borders were supposed to frame each square and tie the entire design together. However, with the colorful edge before the black border, the squares looked a bit too busy, and the overall effect was not as polished as I wanted.
Modifying Granny Square Cardigan Colors
I pondered two options: leave the motifs as they were or modify them by switching the last color to black. This would mean that the final round of each square would be black before the border, creating a stronger contrast and a cleaner edge.
To make an informed decision, I crafted a few motifs with the adjusted color scheme. Seeing them side by side with the original motifs made the difference clear.
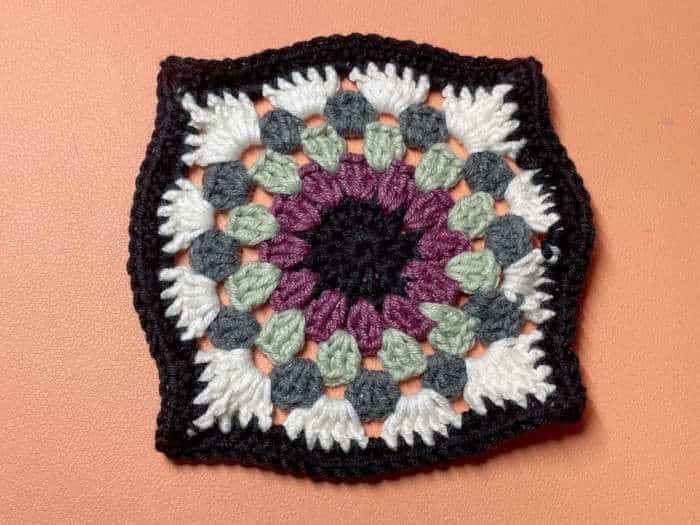
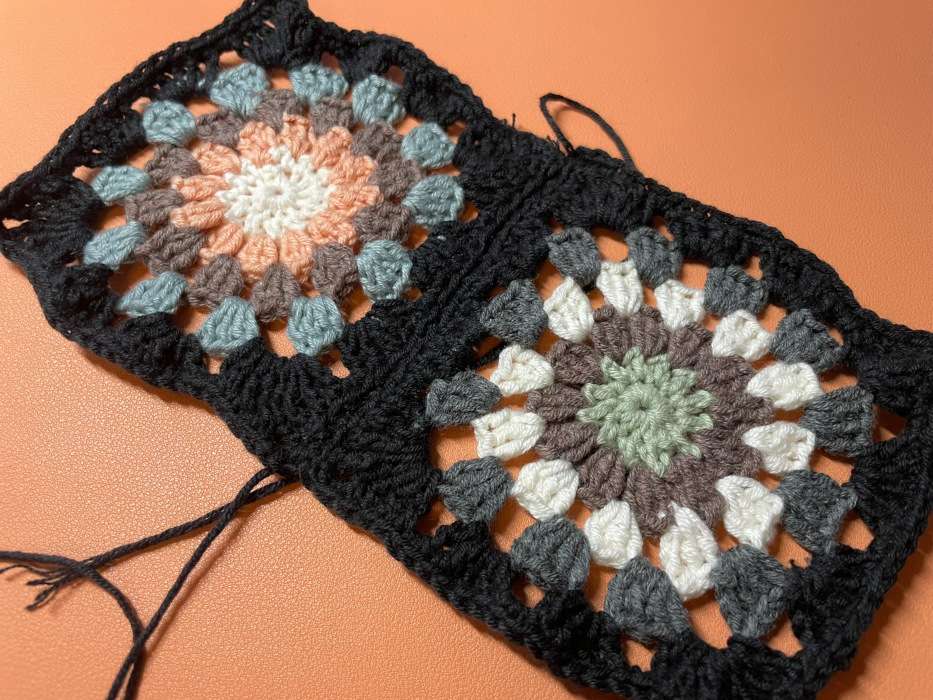
The motifs with the last color switched to black looked cleaner, and the black edges provided the contrast I was aiming for. The squares seemed to pop, and the overall design felt more cohesive. This revelation meant I’d need to modify all 46 existing motifs and create an additional 30 motifs with the new color scheme, along with reworking the sleeves and hem.
Embracing the Learning Curve
I’ll be honest—the thought of redoing all that work was initially frustrating. Crocheting 76 motifs is no small task, especially when you’ve already put in so much time and effort. However, I reminded myself that this is all part of the creative process.
This project has been a significant learning opportunity. It’s my first time crocheting clothing, and adapting the pattern to suit my vision has taught me a lot about garment construction, pattern modification, and the importance of planning.
I’ve learned to:
- Double-check measurements and counts to avoid surprises later on.
- Be flexible and open to making changes when something doesn’t turn out as expected.
- Embrace mistakes as learning opportunities, not failures.
- Take the time to experiment with different options before committing to a design.
Despite the setbacks, it’s been surprisingly fun to explore different options and experiment with what works best. Adjusting, rethinking, and sometimes starting over are all part of crafting something unique.
What’s Next for My Granny Square Cardigan?
So, what’s the plan moving forward?
- Modify the existing motifs: I’ll start by changing the last color to black on all the current squares. This will give me a chance to perfect the process before moving on to new motifs.
- Crochet the additional 30 motifs: With the new color scheme in mind, I’ll create the extra squares needed to achieve the desired size.
- Redesign the sleeves: I’ll plan out the balloon sleeves, ensuring they have the fullness and style I want.
- Assemble carefully: With all the pieces ready, I’ll take my time connecting them to ensure the cardigan comes together beautifully.
I’m excited to continue this journey and see how the cardigan evolves. While there’s still a lot of work ahead, I know that the end result will be worth it.
Final Thoughts
Creating this crochet granny square cardigan has been more challenging than I initially expected, but it’s also been incredibly rewarding. Modifying the granny square cardigan pattern and figuring out how to adjust the crochet cardigan size has deepened my understanding of crochet techniques and garment construction.
I hope that by sharing my experiences, I can inspire others to take on ambitious projects and not be discouraged by obstacles along the way. Crafting is as much about the process as it is about the finished product, and there’s always something new to learn.
Stay tuned for more updates as I (hopefully) inch closer to completing this cardigan. Thanks for following along, and happy crafting!
🧶 Must-Try Knitting & Crochet Projects
- Bottom-Up Cardigan Knitting FO: My First Fall Project
- Last Knitting Project This Summer: Lightweight Sweater Pattern
- My Favorite Things: Camisole No.4 — Simple Camisole Knitting FO
- Granny Square Cardigan FO: The Final Touches
- Modifying My Crochet Granny Square Cardigan for a Perfect Fit
- JHIA vs. TKGA: Which Knitting Certification Is Right for You?
- JHIA Knitting Certification: Is It Right for You?
- My Granny Square Cardigan Journey: Stitch by Stitch
Ready to start your next knitting project? Explore patterns, tutorials, and ideas for inspiration: Browse All Knitting & Crochet Projects
🧵 Must-Try Knitting Supplies & Ideas
Explore More in Creativity


Latest Updates:


Featured Videos: