DIY Diary Cover: Easy Sewing Project For My Midori MD Diary
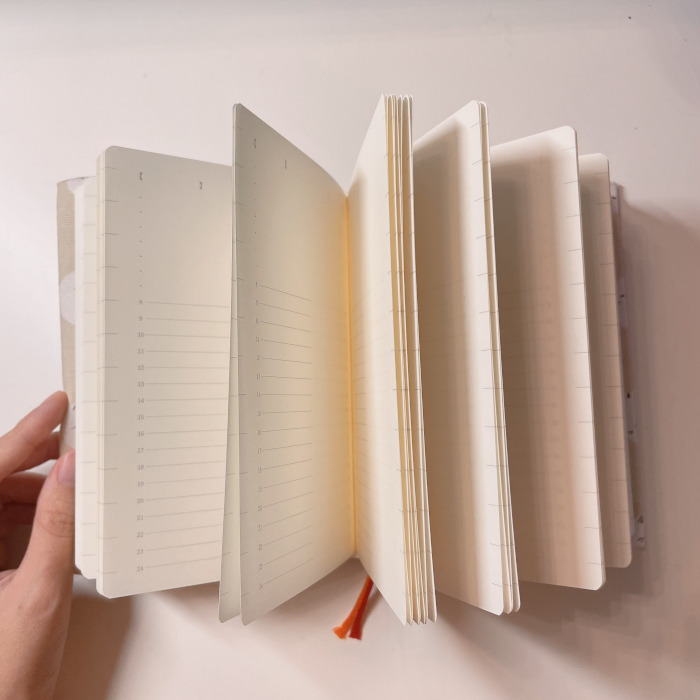
If you’re looking to sew your own planner cover or create a custom planner cover for your Midori MD Diary, this project is for you. Recently, I picked up the Midori MD Diary 1 Day 1 Page 2025 (A6) and wanted to protect its minimalist design while adding a personal touch. Instead of buying a pre-made cover, I decided to sew my own DIY adjustable Midori MD Diary cover. This simple project turned out great and gave me a cover that expands as I add more to my diary throughout the year.
I followed a great adjustable notebook cover tutorial by Serenemel, which provided clear and easy-to-follow instructions. One of the best features of this design is the adjustable width, allowing the cover to grow along with my planner as it fills up. This means that even as I add more pages, photos, or inserts, the cover remains functional and aesthetically pleasing. The flexibility of this design ensures that I don’t have to worry about my planner outgrowing the cover mid-year. If you’re looking for a custom planner cover that gives you control over the style, functionality, and longevity of your planner, this is a practical and flexible solution. Plus, making it myself allowed me to add personal touches that make the cover truly unique.
Table of Contents
Why Make an Adjustable Cover?

I initially considered buying a cover, but I realized that as I add things like photos, receipts, and other keepsakes to my diary, the planner would get bulkier over time. A standard cover wouldn’t be able to accommodate that, so an adjustable cover was the best solution.
By making my own, I could ensure that my planner would always fit comfortably, regardless of how much I add throughout the year. Unlike pre-made covers, which often come in fixed sizes, my adjustable cover adapts to the changing thickness of my diary, giving me peace of mind that it will last the entire year without feeling too tight or restrictive.
Additionally, a DIY approach gave me the freedom to pick the exact materials and design that best suited my aesthetic, making the cover feel more personal and unique. Choosing fabric that I love and sewing the cover myself allowed me to infuse a bit of my personality into it. Every time I use my planner, I get a sense of satisfaction knowing that I created something both functional and meaningful.
Materials You’ll Need
Here’s what I used to make my DIY adjustable Midori MD Diary cover for the A6 size:
- Outer fabric: I chose a thick canvas fabric that I bought during a trip to Japan earlier this year. The fabric holds a lot of sentimental value for me, and it makes this cover extra special.
- Inner fabric: I used a different fabric for the inner lining that matched the color of the outer fabric, giving the cover a cohesive and polished look.
- Interlining: The tutorial recommends using thicker interlining to provide both structure and a cushiony feel. However, since my canvas fabric was already thick, I decided to go with a thinner interlining. This worked well for my cover, adding just enough structure without making it too bulky.
- Thread: You can match your thread to your fabric, or use a contrasting color to add a bit of visual interest. I went with a matching thread for a cleaner look.
- Sewing machine: While hand sewing is possible, a sewing machine makes the process quicker and results in more even stitching.
- Measuring tape and scissors: Essential tools for ensuring your measurements are accurate.
- Pins or clips: These are used to hold the fabric pieces in place as you sew.
Diary Dimensions and Cover Calculations
For those interested in making their own cover, here are the measurements and calculations I used based on my Midori MD Diary 2025:
- Diary Dimensions:
- Width (W): 11 cm
- Height (H): 15.5 cm
- Thickness (T): 2.5 cm
- Cover Dimensions:
- Flap (F): 9 cm (This allows for easy adjustment as the diary expands.)
- Width of the Cover: W × 2 + T + F × 2 + 3 = 45.5 cm
- Height of the Cover: H + 2.5 = 18 cm
- Band to Hold the Flap: 12 cm × Height of the Cover = 12 cm × 18 cm
- Interlining for Structure: (Width of the Cover – 2) × (Height of the Cover – 2) = 43.5 cm × 16 cm
These calculations create a snug fit for the diary while ensuring the flap allows for future adjustments as the diary grows thicker over time. This design is especially helpful if you like to attach extra papers, add inserts, or incorporate additional accessories like stickers and washi tapes. The flexibility also means that if you switch to a slightly different planner in the future, you may still be able to use the same cover with minor modifications.
Sewing Process
A more detailed step-by-step guide can be found in Serenemel’s Tutorial, which I followed to make my adjustable cover.
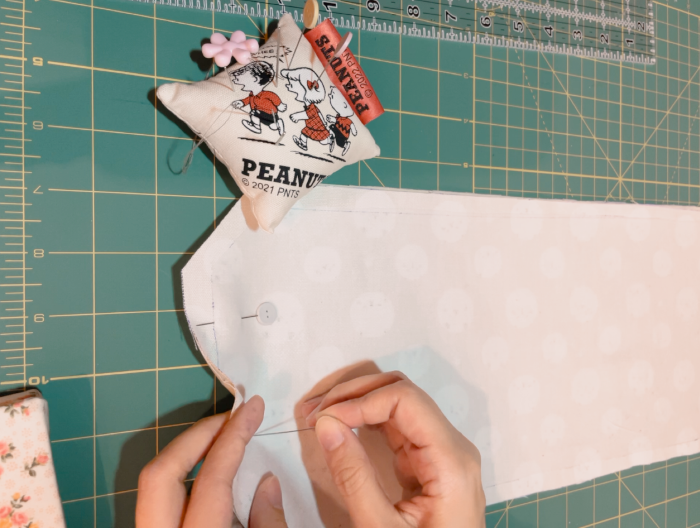
1. Cutting the Fabric
I started by cutting all fabric pieces according to my measurements, including the outer fabric, inner fabric, interlining, and the band for the flap.
2. Assembling the Layers
I layered the fabric pieces as follows:
- The outer fabric facing up
- The inner fabric facing down (right sides together)
- The interlining positioned between them
I pinned the layers together, leaving an opening to turn the cover inside out later.
3. Sewing the Edges
Using my sewing machine, I stitched along the edges with a 1 cm seam allowance, ensuring that the corners were neatly sewn. I reinforced the stitches at stress points, especially around the flap area, for added durability.
4. Turning the Cover Inside Out
After stitching, I carefully turned the cover inside out through the opening, then ironed it flat for a crisp look.
5. Final Stitching and Adjustments
I topstitched along the edges to give the cover a finished look and secured the flap by stitching its band in place. Finally, I checked the fit on my Midori MD Diary 2025 to ensure the adjustable flap functioned as intended.
Customizing My Cover
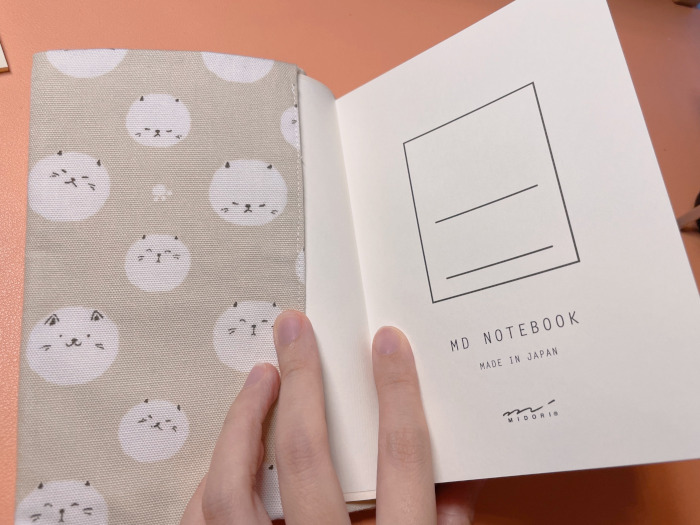
One of the things I loved most about this project was the flexibility to customize it. The canvas fabric I used is durable and pairs beautifully with the minimalist aesthetic of the Midori MD Diary. Using fabric that I bought in Japan adds a personal touch, and I also chose an inner fabric that matched the outer fabric in color, keeping the overall look cohesive and polished.
The thinner interlining was another good decision for this particular project. Since the canvas fabric was already quite thick, the thinner interlining gave the cover structure without making it too stiff or bulky, maintaining the overall look and feel I wanted.
Additionally, using fabric that I personally selected and assembled added a meaningful, personal touch to the final product. Every stitch reflects my effort and creativity, making the cover feel even more special. Unlike store-bought covers, this DIY version carries sentimental value, reminding me of the time and care I put into crafting it. The combination of fabric selection, careful stitching, and personalized adjustments ensures that my planner cover is not just functional but also a unique expression of my style.
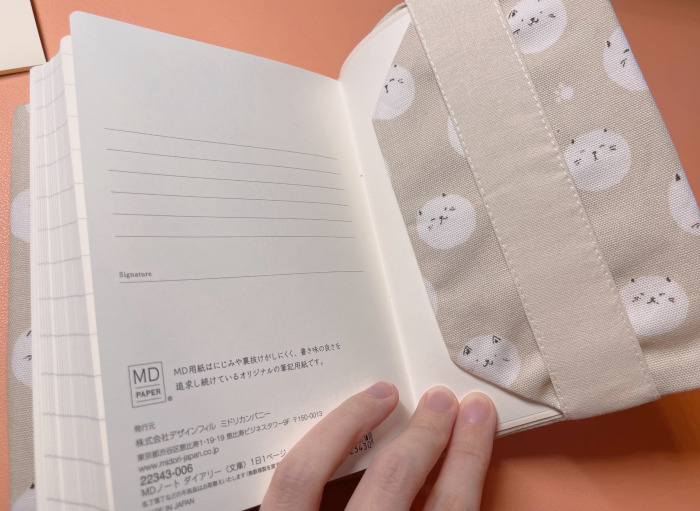
Looking back, I think I could have made the flap a bit shorter. As it stands, the flap goes almost all the way across the back cover, covering the inside of the back cover of the notebook. In most photos I’ve seen of adjustable covers, the flap is about one-third of the width of the back cover, which gives the cover a sleeker and more compact look. While it’s not uncomfortable, I might adjust the flap length if I make another cover in the future.
Some parts of the cover are imperfect, but thankfully, the flaws are barely noticeable. I do wish I were more skillful, as better sewing technique could have resulted in an even cleaner finish.
Pros and Cons of Making a DIY Diary Cover
Making a DIY diary cover comes with both advantages and challenges. While the process allows for complete customization, it also requires time and some level of sewing proficiency. Below are the main pros and cons to consider before starting your own project.
Pros:
- Fully customizable—choose your own fabric and colors.
- Adjustable size accommodates diary expansion.
- Durable and reusable for multiple years.
- Handmade element adds sentimental value.
Cons:
- Requires sewing skills and a sewing machine for best results.
- Cutting and measuring take time, and mistakes can be hard to fix.
- Not as quick as purchasing a pre-made cover.
Final Thoughts
This project turned out to be both fun and practical. By making my own DIY adjustable Midori MD Diary cover, I was able to create something that perfectly suits my needs. The tutorial was clear and easy to follow, and I’m really pleased with the end result. Not only is the cover functional, but it also holds personal significance due to the fabric I used.
Explore More in Creative Endeavors

The Ultimate Guide to Digital Journaling: Top Apps, Tips and More
Customize Traveler's Notebooks: Multi-Color Braiding
Benefits of Decluttering: How a Tidy Space Can Transform Your Life

JLPT Last-Minute Preparation: Essential Tips for the Final Month

How to Declutter Your Space: 6 Easy and Simple Decluttering Tips
Knitting Certification Programs: JHIA vs. TKGA Comparison Guide
Traveler's Notebook Care: Tips and Leather Conditioning Guide
Best 2025 Planners: Customization & Fountain Pens
Featured Videos:


